- PAGE SETTINGSClick on the gear to simplify view
- Settings

Lesson Plan
What You’ll Need
Before we get started, let’s make sure that we have all the parts.
Overview
In this lesson, we’ll be learning about the tool that software engineers need to do their job and also how to set up that tool on your computer.
The Tool For Software Engineering
To start, we need to set up your computer with an integrated development environment (IDE). An IDE is just like any tool that allows someone to do their job. For example, a chef needs a knife. A car mechanic needs a wrench. A software engineer needs their IDE. Specifically, an IDE is the thing that allows a software engineer to:
- Write code
- Prepare the code to be sent out
There are lots of types of IDEs. There are IDEs for video games, apps for your smartphone, making websites and lots more. The IDE we will be using is designed to allow us to write code for our robot and to prepare that code to be sent out to our robot’s brain.
Each type of computer has their own version of the IDE, so your first task is to figure out which type of computer you have: Chromebook, Macbook or Windows PC.
Click on either the Chromebook, Macbook or Windows PC link to find the right instructions on how to set up your IDE.
Chromebook IDE Setup

For Chromebooks, your IDE will be a website called Barnabas Blocks. Follow the instructions below to get it working.
Before starting:
- Make sure that your Chromebook is powered on and charged (or charging)
- Make sure that your Chromebook has access to the internet
Enable Experimental Web Platform features
Your Chromebook has special secret features that we need to enable so that it will be able to communicate with your Uno. We’ll go through how to enable this cool feature.
1. Open your Google Chrome browser
2. Copy and paste this text into your address bar.
3. Select “Enabled” on the “Experimental Web Platform features”
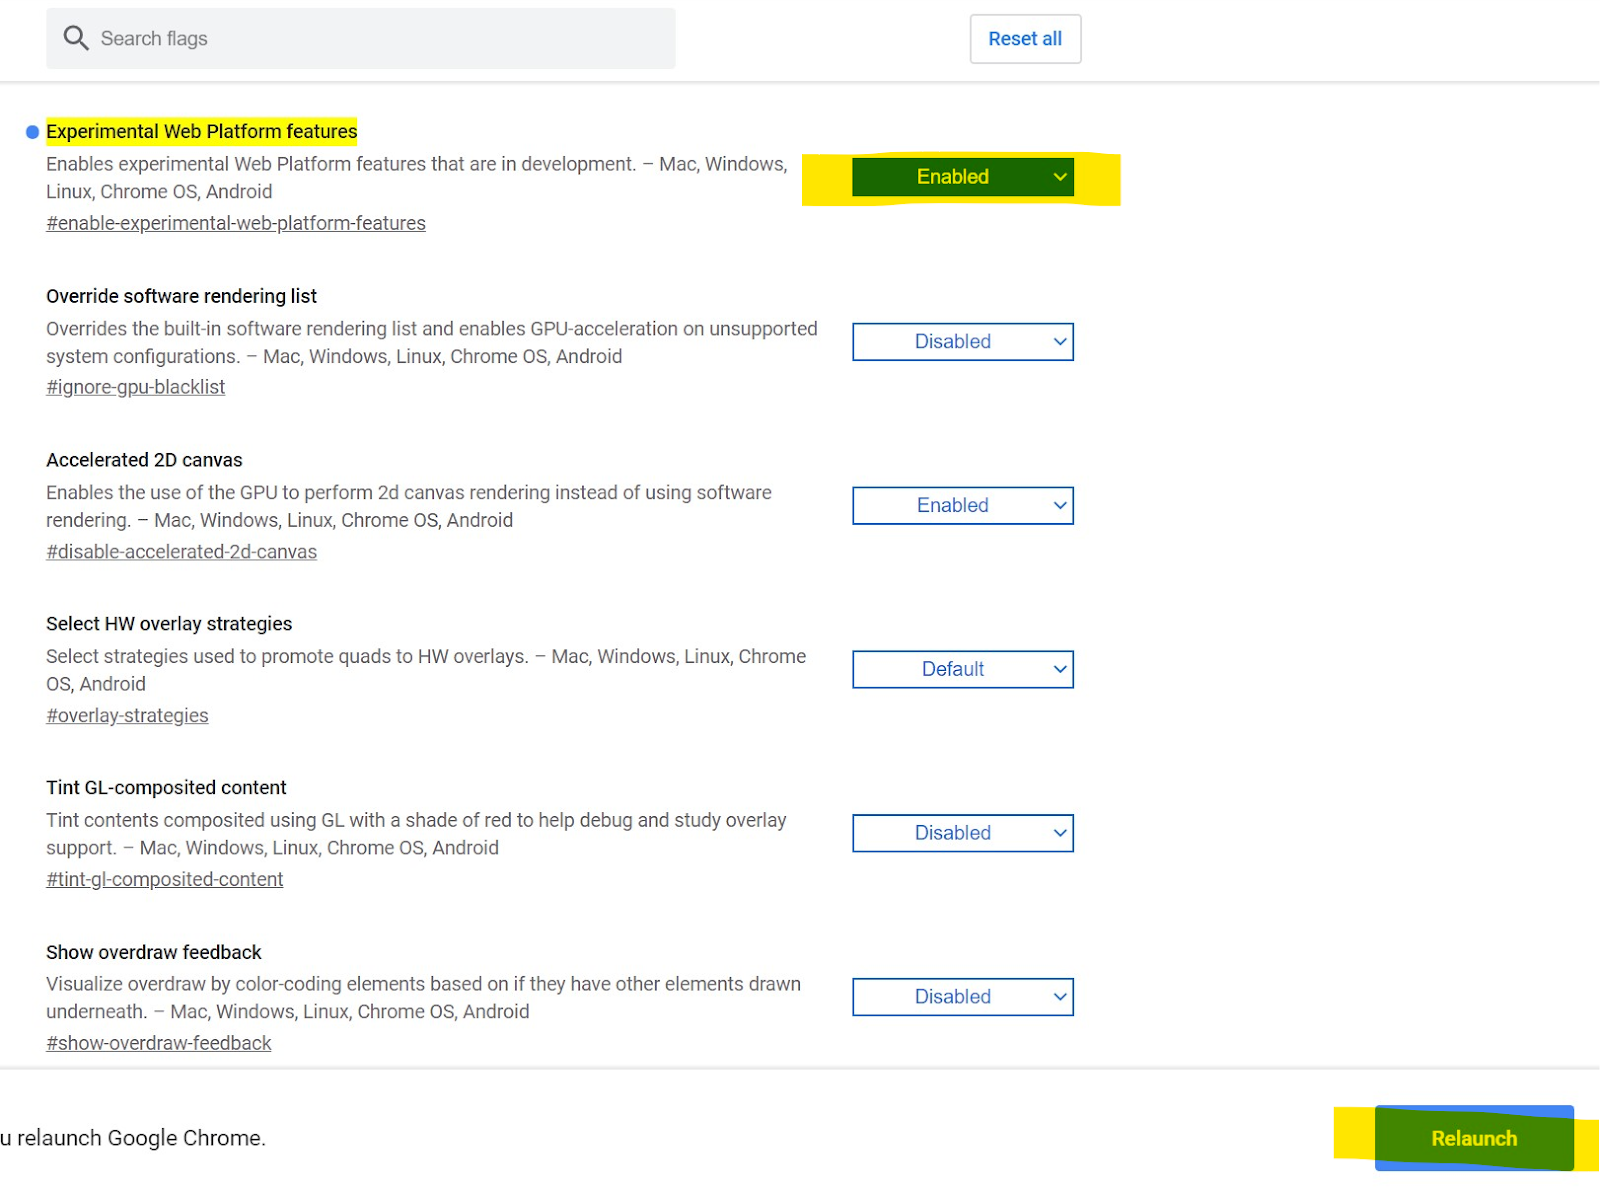
4. Click “Relaunch”
5. Visit The IDE
Your Chromebook is now ready. That was easy, right? Type the link below (or copy and paste) into your address bar to check out your IDE!
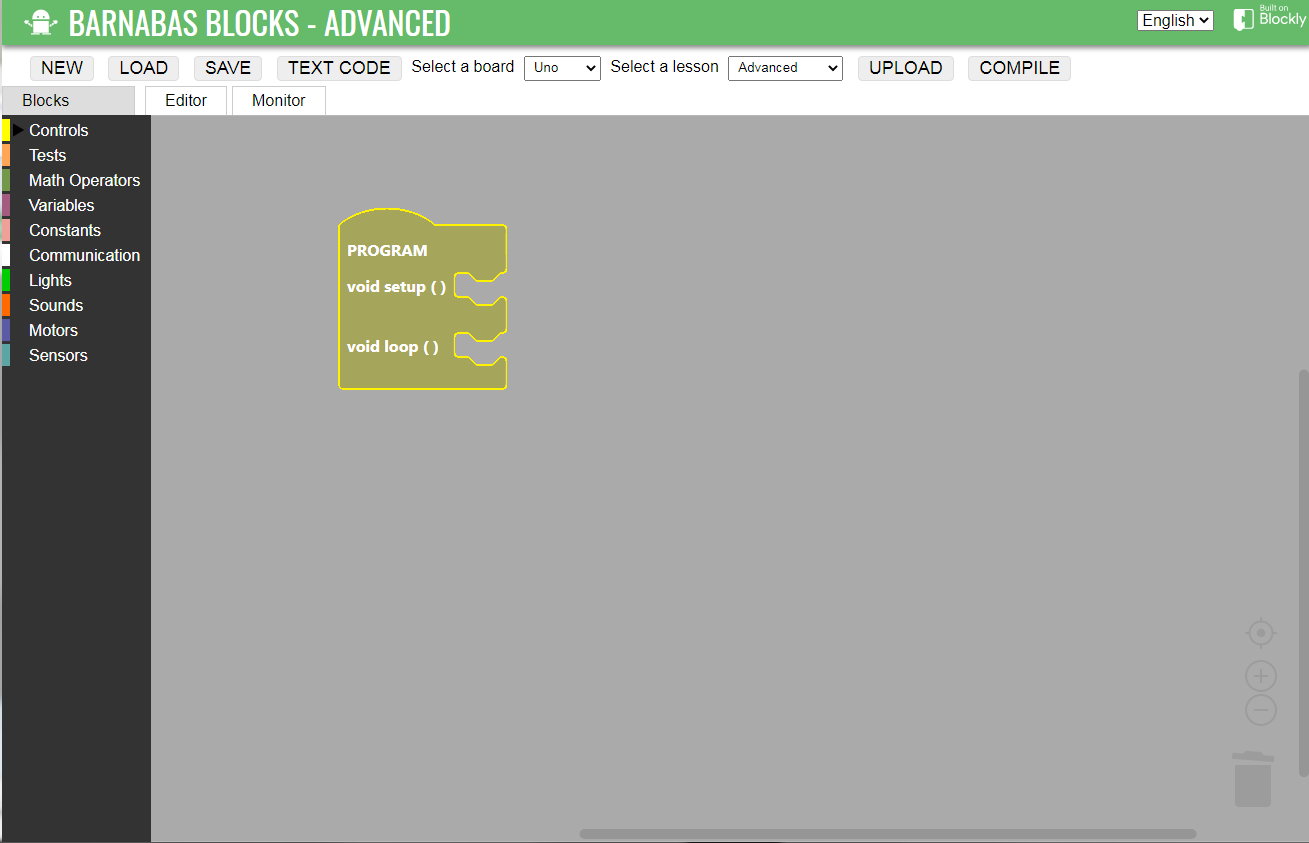
6. Upload Code
-
Connect your Uno to your Chromebook using a USB cable. A red light should turn on on your Uno board.
-
Set “Select a board” to “Uno”
-
Set “Select a lesson” to “Advanced”
-
Drag an empty yellow program loop into your workspace
-
Click “Upload”
-
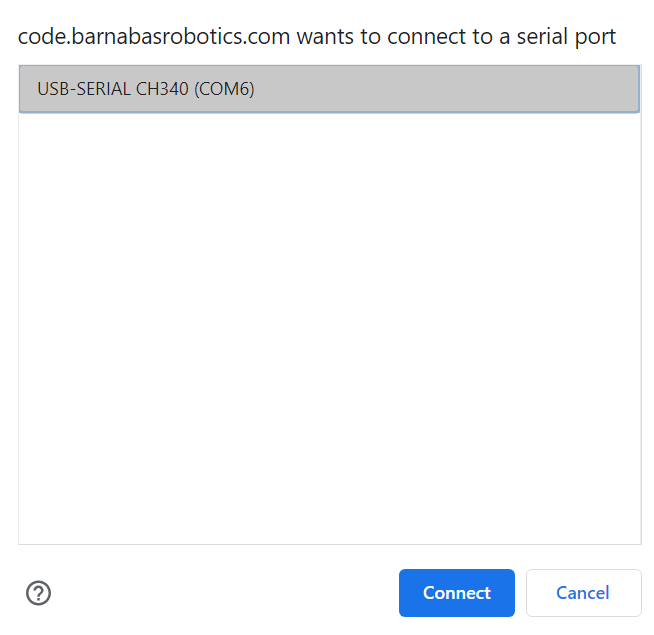
Select the COM port and click “Connect”
Macbook IDE Setup

For Macbooks, your IDE is called Ardublock. We’re going to need to download something called a package file (.pkg) from the internet and then run the .pkg so that it can install the IDE onto your Macbook.
Before starting:
- Make sure that your Macbook is powered on and charged (or charging)
- Make sure that your Macbook has access to the internet
1. Download And Install
Download the .pkg file and run it. Detailed instruction can be found here.
2. Upload Code
Learn how to connect your Uno board to your computer and upload code by watching this video.
Windows PC IDE Setup

For Windows PCs, your IDE is called Ardublock. We’re going to need to download something called an executable file (.exe) from the internet and then run the .exe so that it can install the IDE onto your Windows PC.
We’re going to use a super cool software engineering tool called the terminal to do this.
Before starting:
- Make sure that your Windows PC is powered on and charged (or charging)
- Make sure that your Windows PC has access to the internet
1. Download And Install
Download the windows installer and run it.
2. Upload Code
Learn how to connect your Uno to your computer and upload code by watching this video.